Introduction
This article outlines the process of installing Parrot OS Architect using Parallels Desktop, a popular virtualization software that enables the running of multiple operating systems on a Mac.
ParrotOS is renowned for its advanced security features and comprehensive suite of tools for penetration testing and ethical hacking. The guide begins with an overview of the initial steps in setting up Parrot OS Architect in a virtualized environment. It covers the installation process in Parallels Desktop, ensuring that readers are equipped with the knowledge to navigate through potential challenges and configurations specific to Parrot OS.
ParrotOS Architect is ParrotOS with nothing pre-installed.
Furthermore, the article provides insights into optimizing the performance of Parrot OS on a Mac, discussing how to effectively manage resources and settings within Parallels Desktop. Special attention is given to network configurations, security settings, and the integration of essential tools, enabling users to fully exploit the capabilities of Parrot OS in a secure and efficient manner. This guide is an essential read for those seeking a thorough and professional approach to installing Parrot OS Architect on a Mac, ensuring a stable and productive computing environment.
Steps to setup your ParrotOS
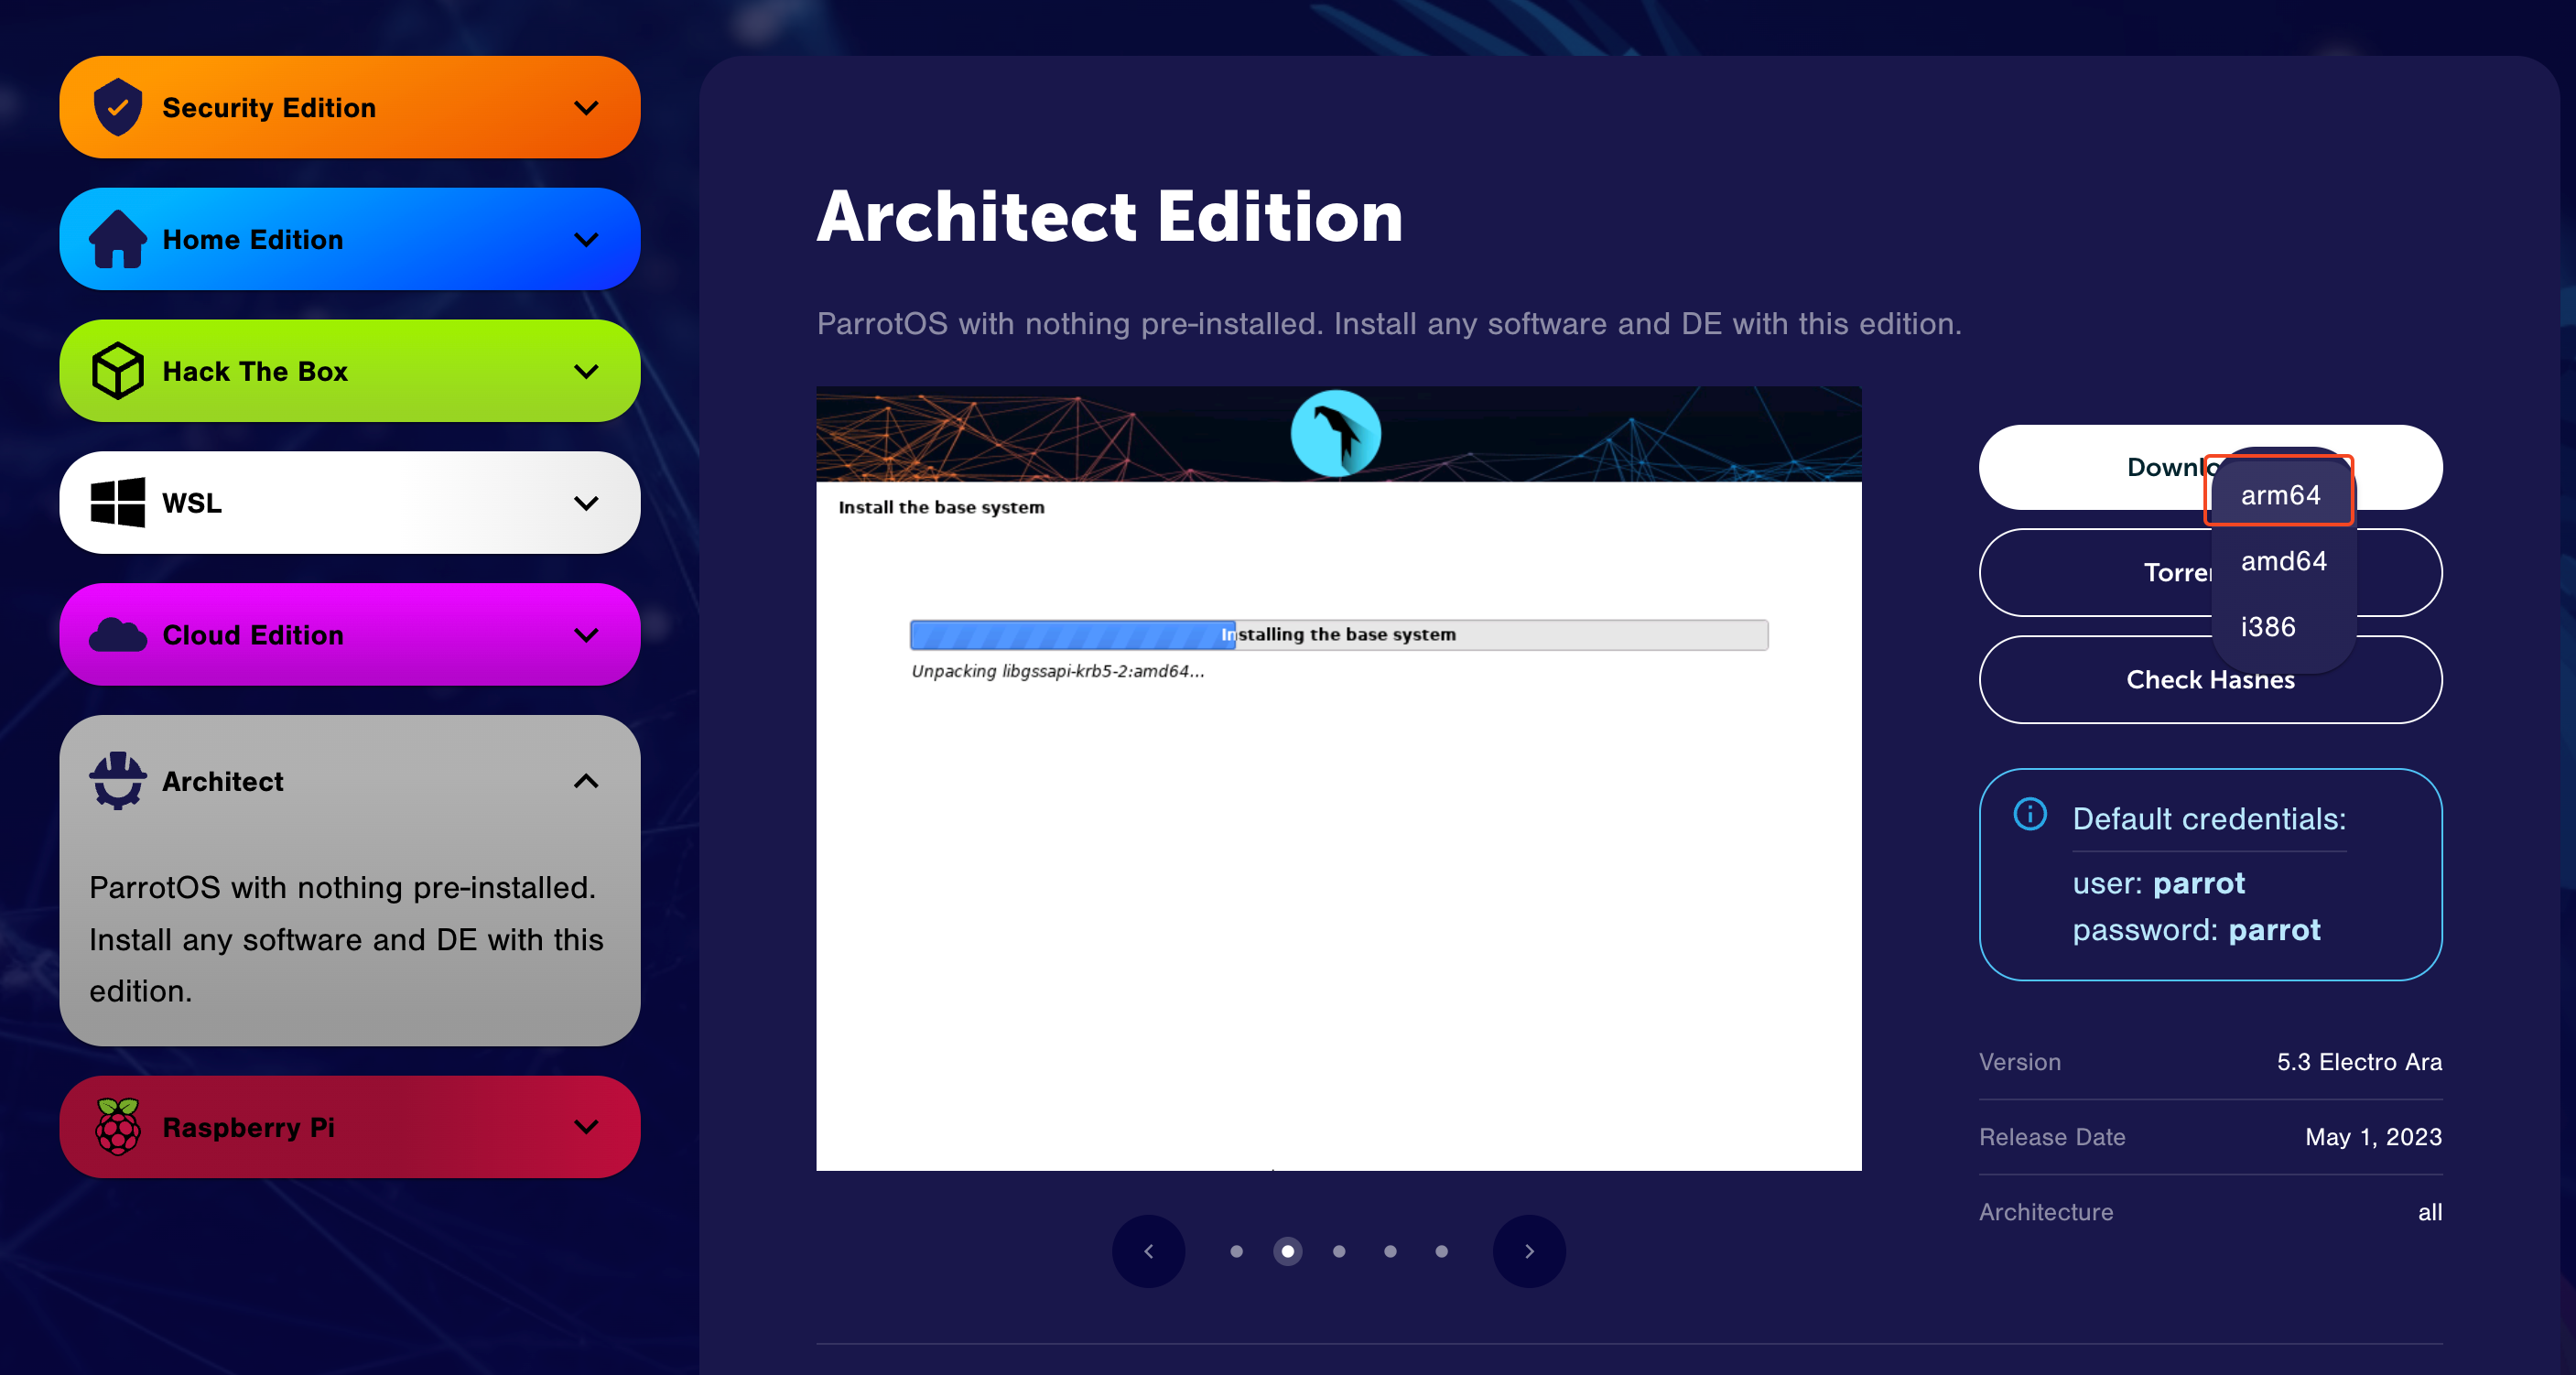
- We need to install ParrotOS and for that, we need an image file. You can download it from https://www.parrotsec.org/download/. Make sure you download
arm64image for Parrot Architect.
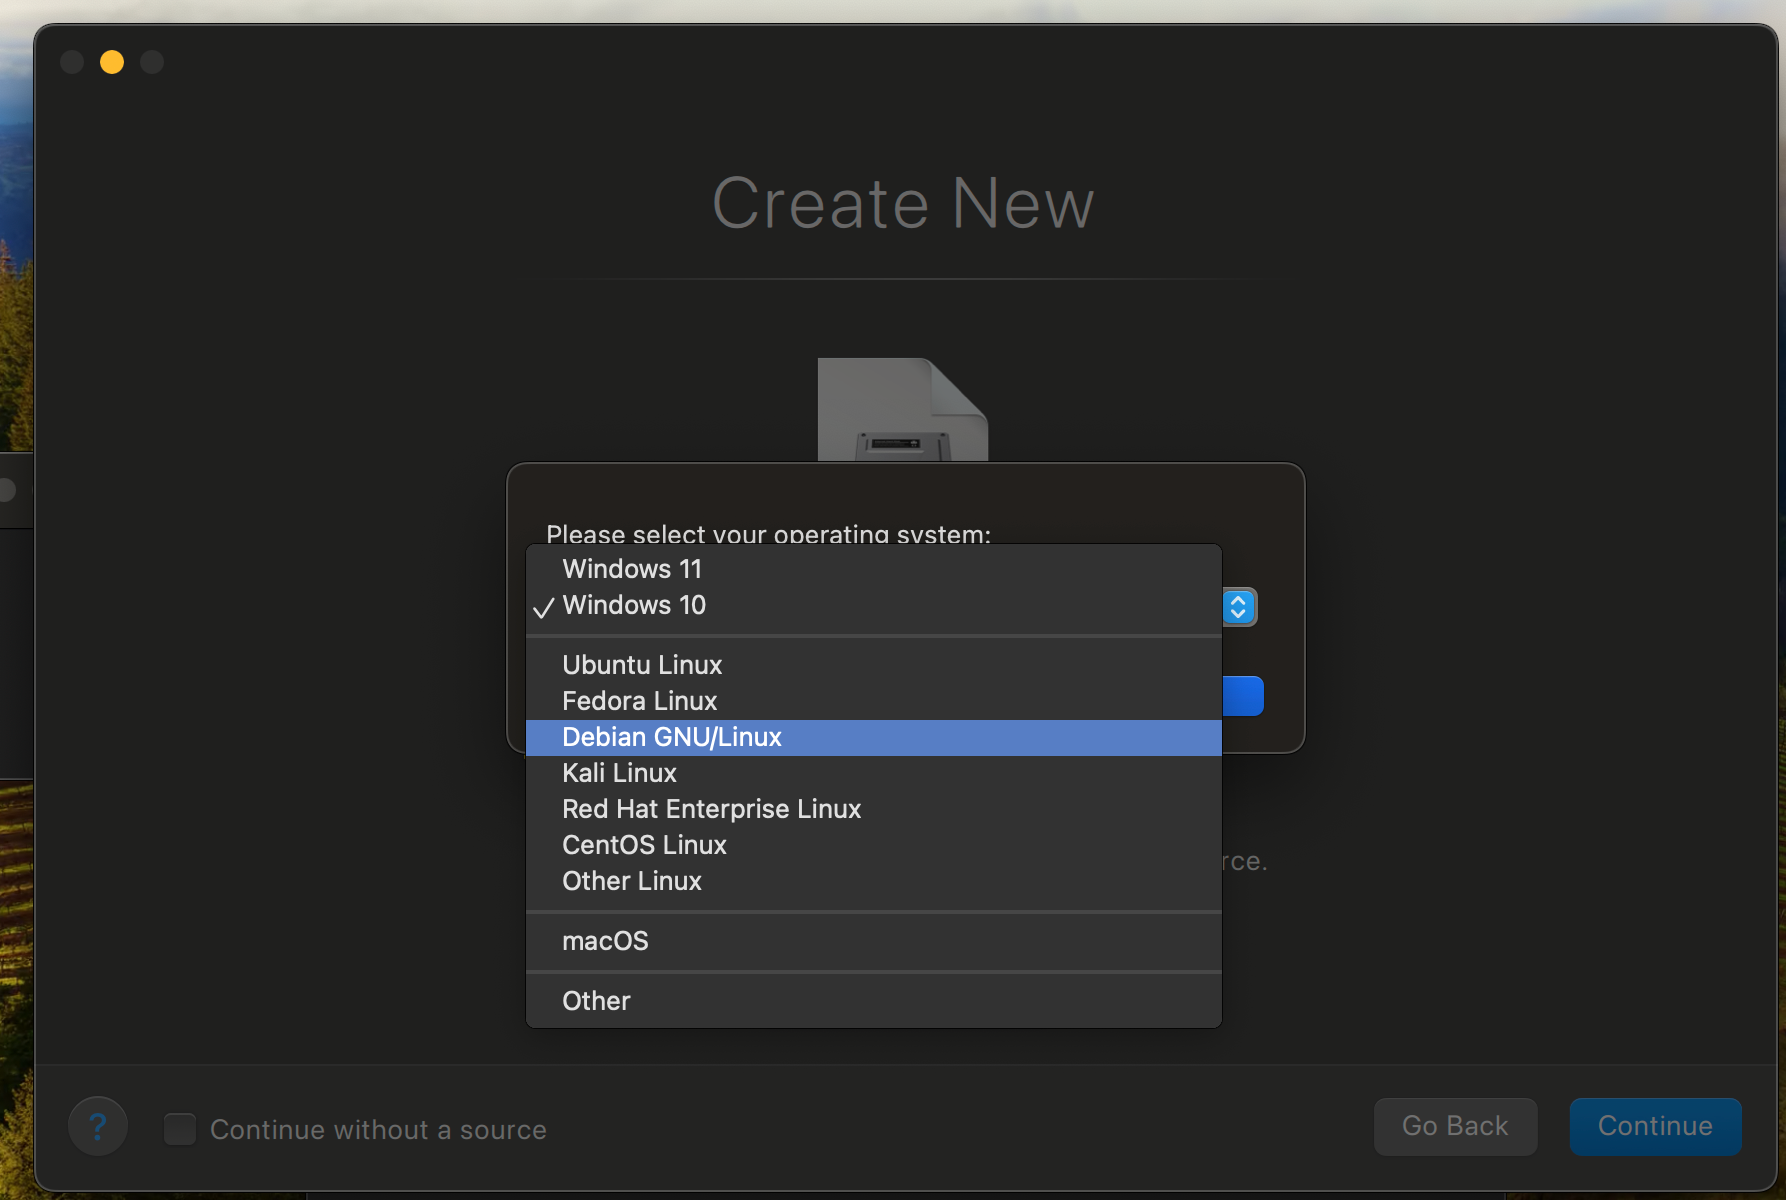
- Run Parallels and add ParrotOS image to it. When asked to select your OS, choose Debian GNU/Linux.
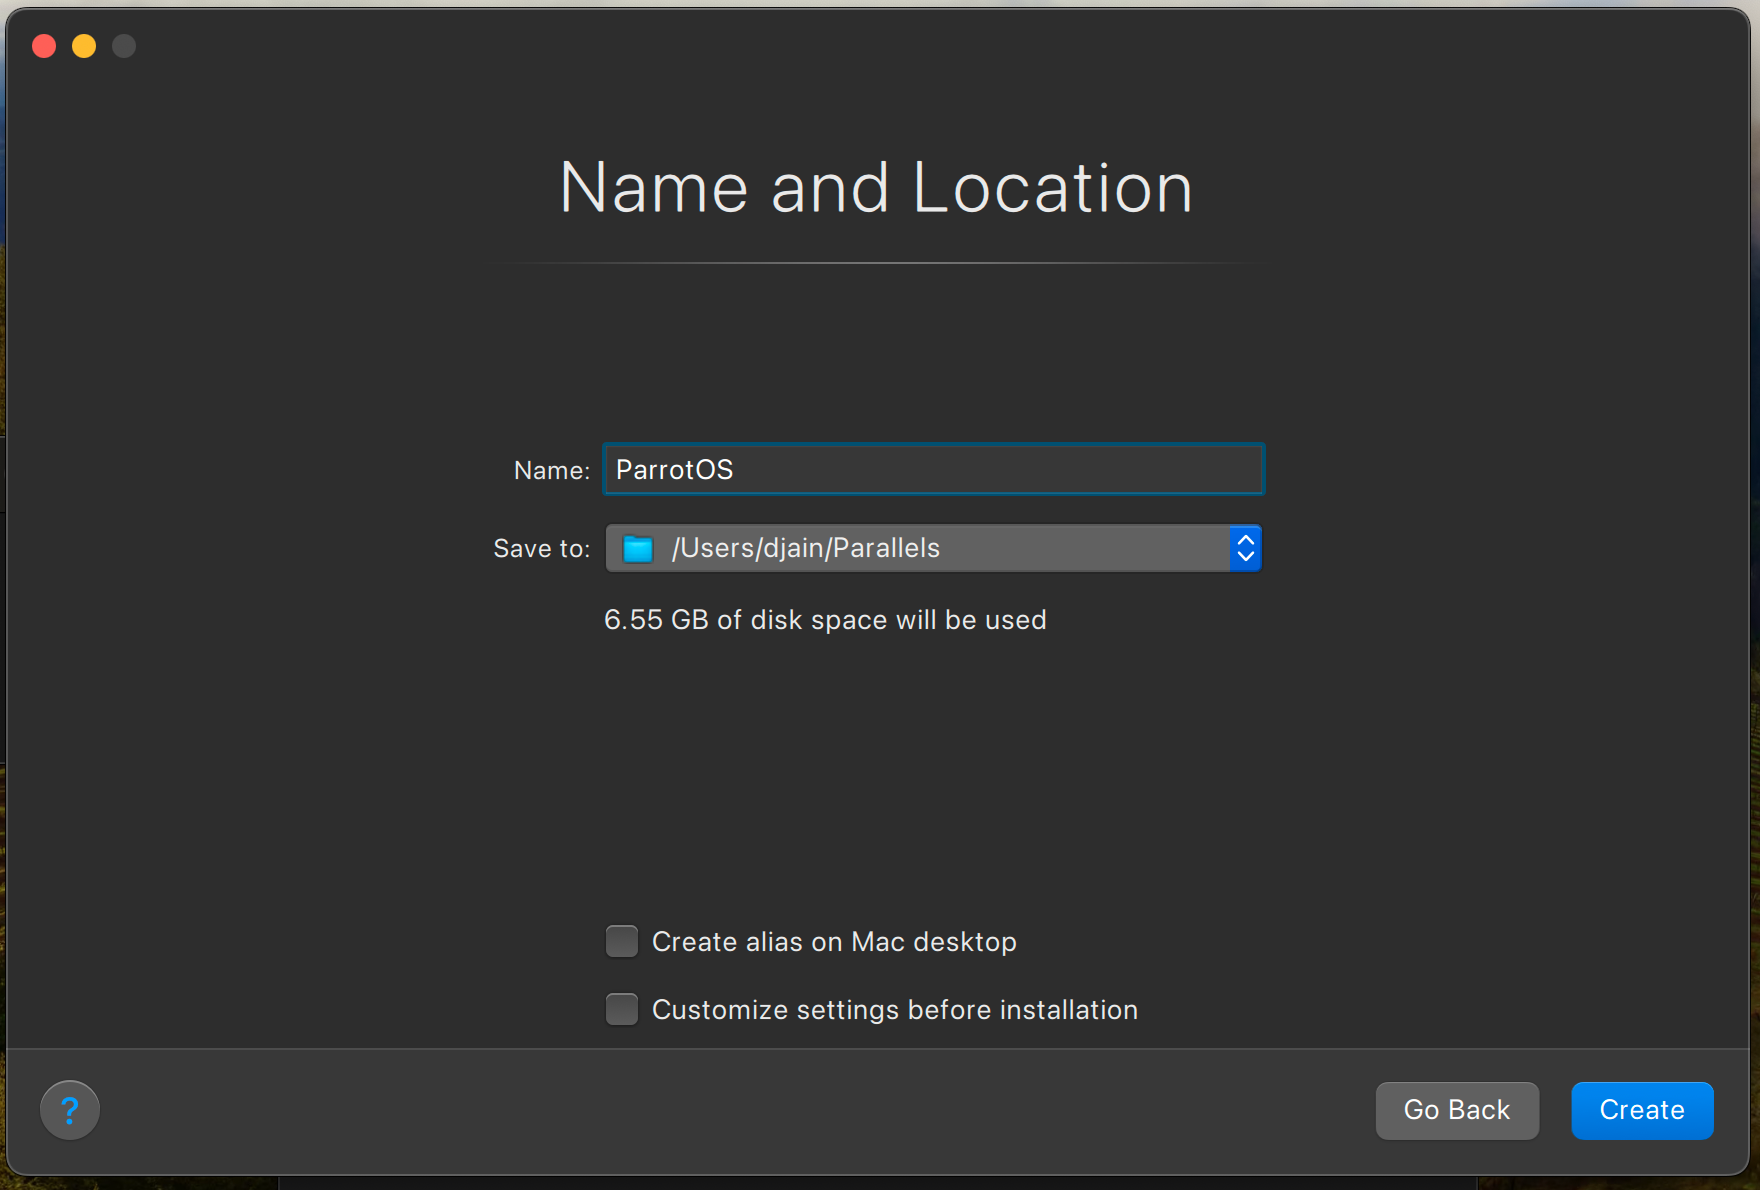
- Provide a name and location for the installation and click on Create.
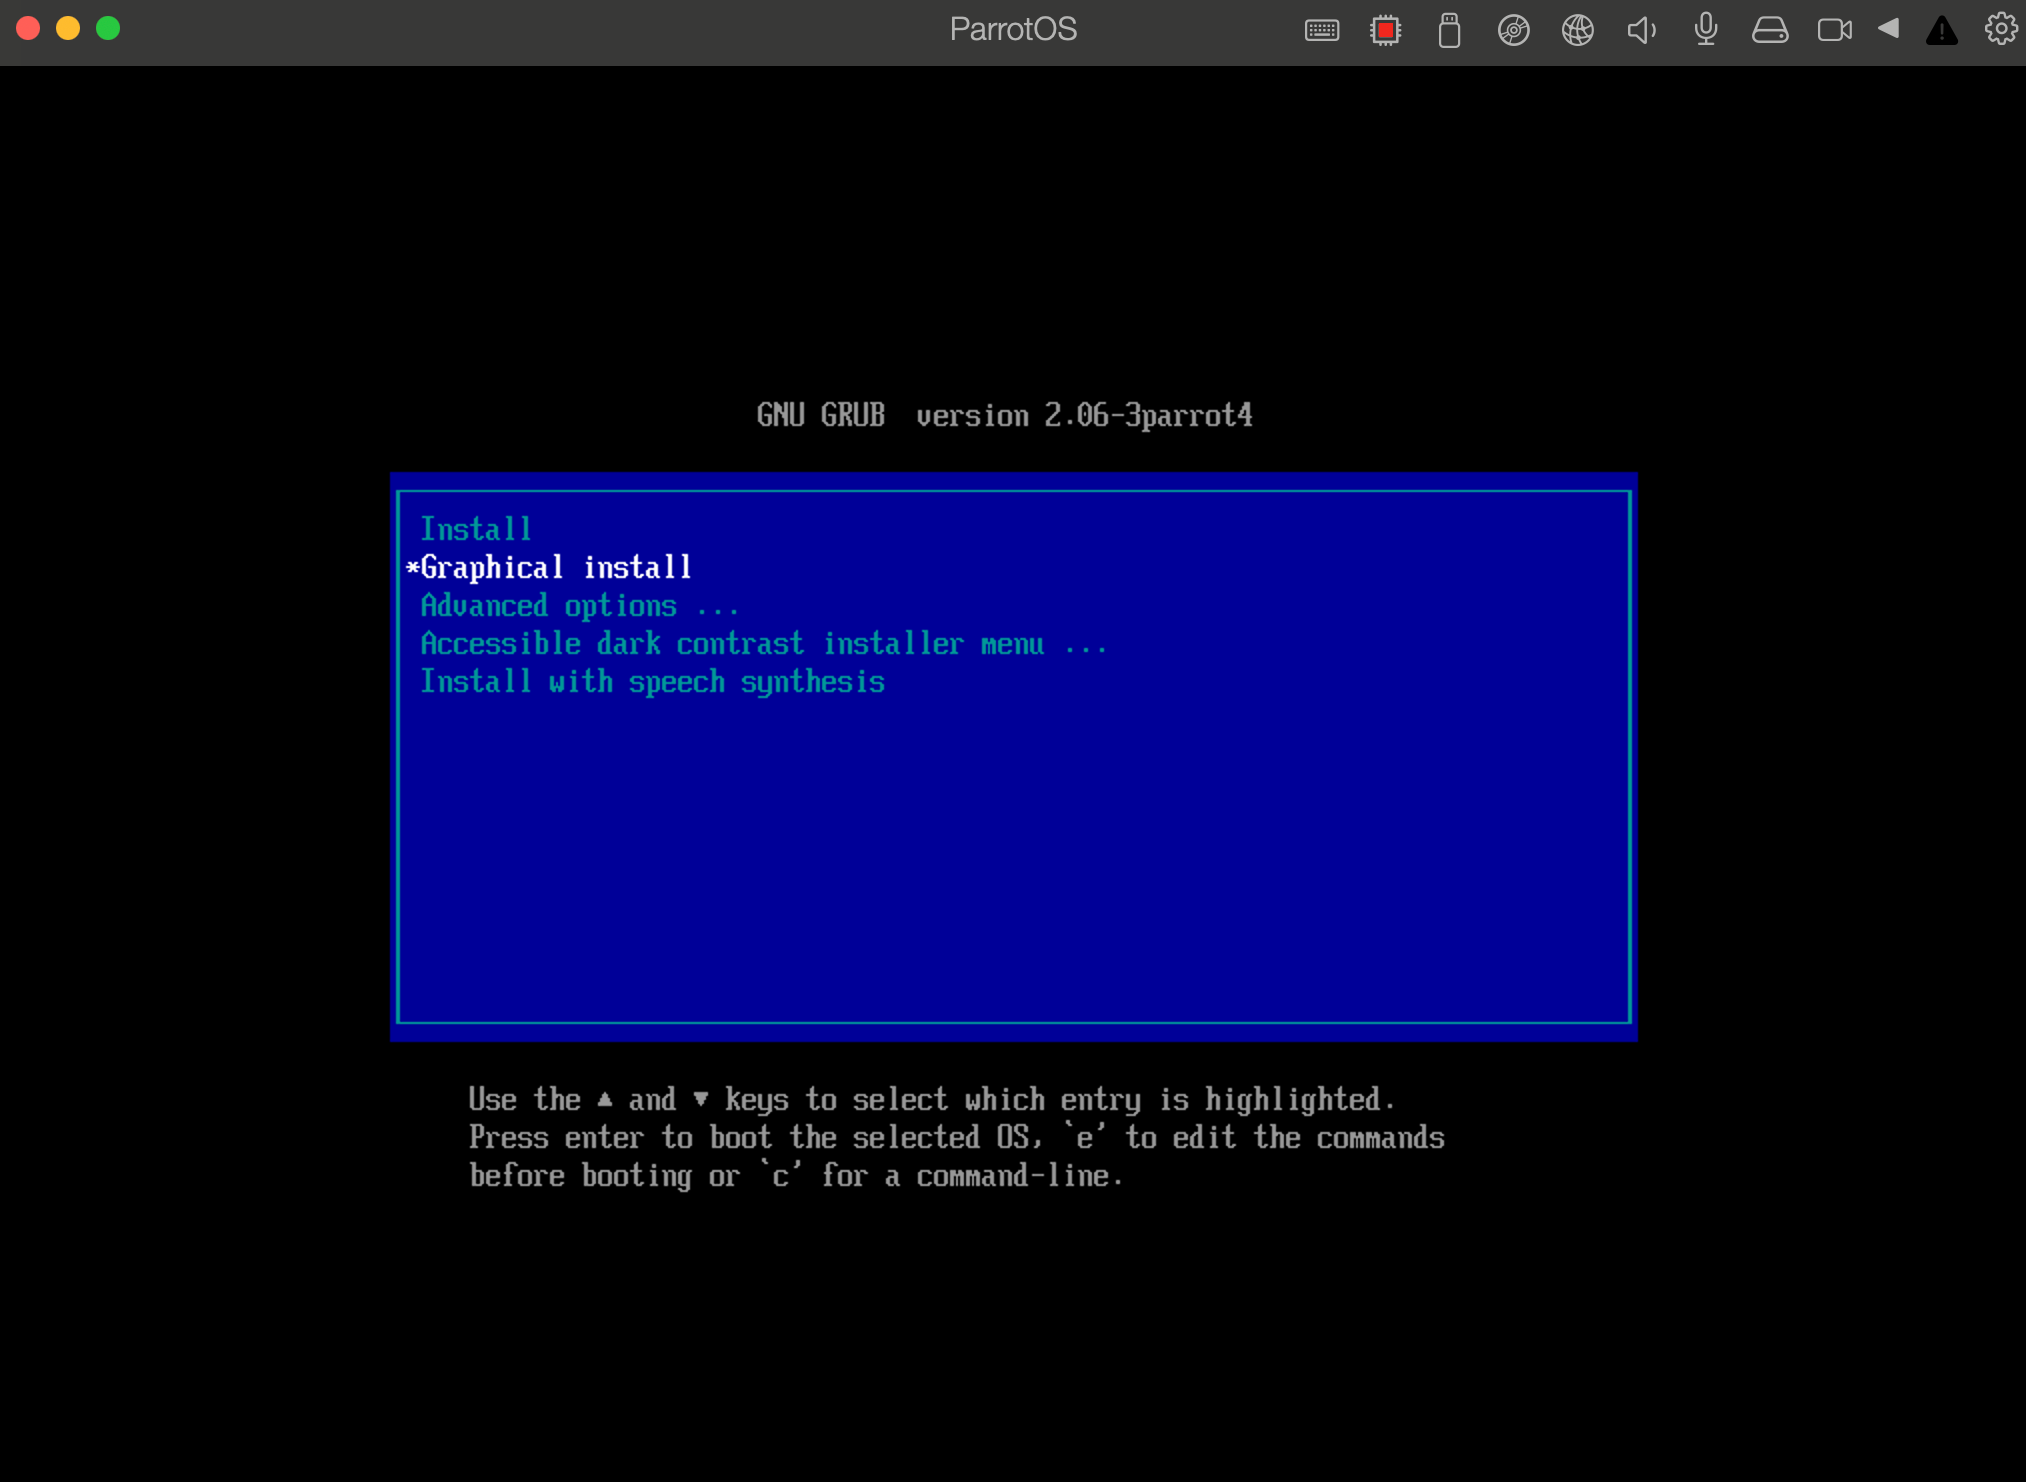
- Click on Graphical Install when presented with installation screen.
-
Choose language and region settings as per your requirements.
-
Set Hostname as you like. For ex:
parrotOS. -
Set domain to something like
localdomain. -
You can just
Continuethe next 3 steps or change them according to what you want. -
Set your name, username and password
-
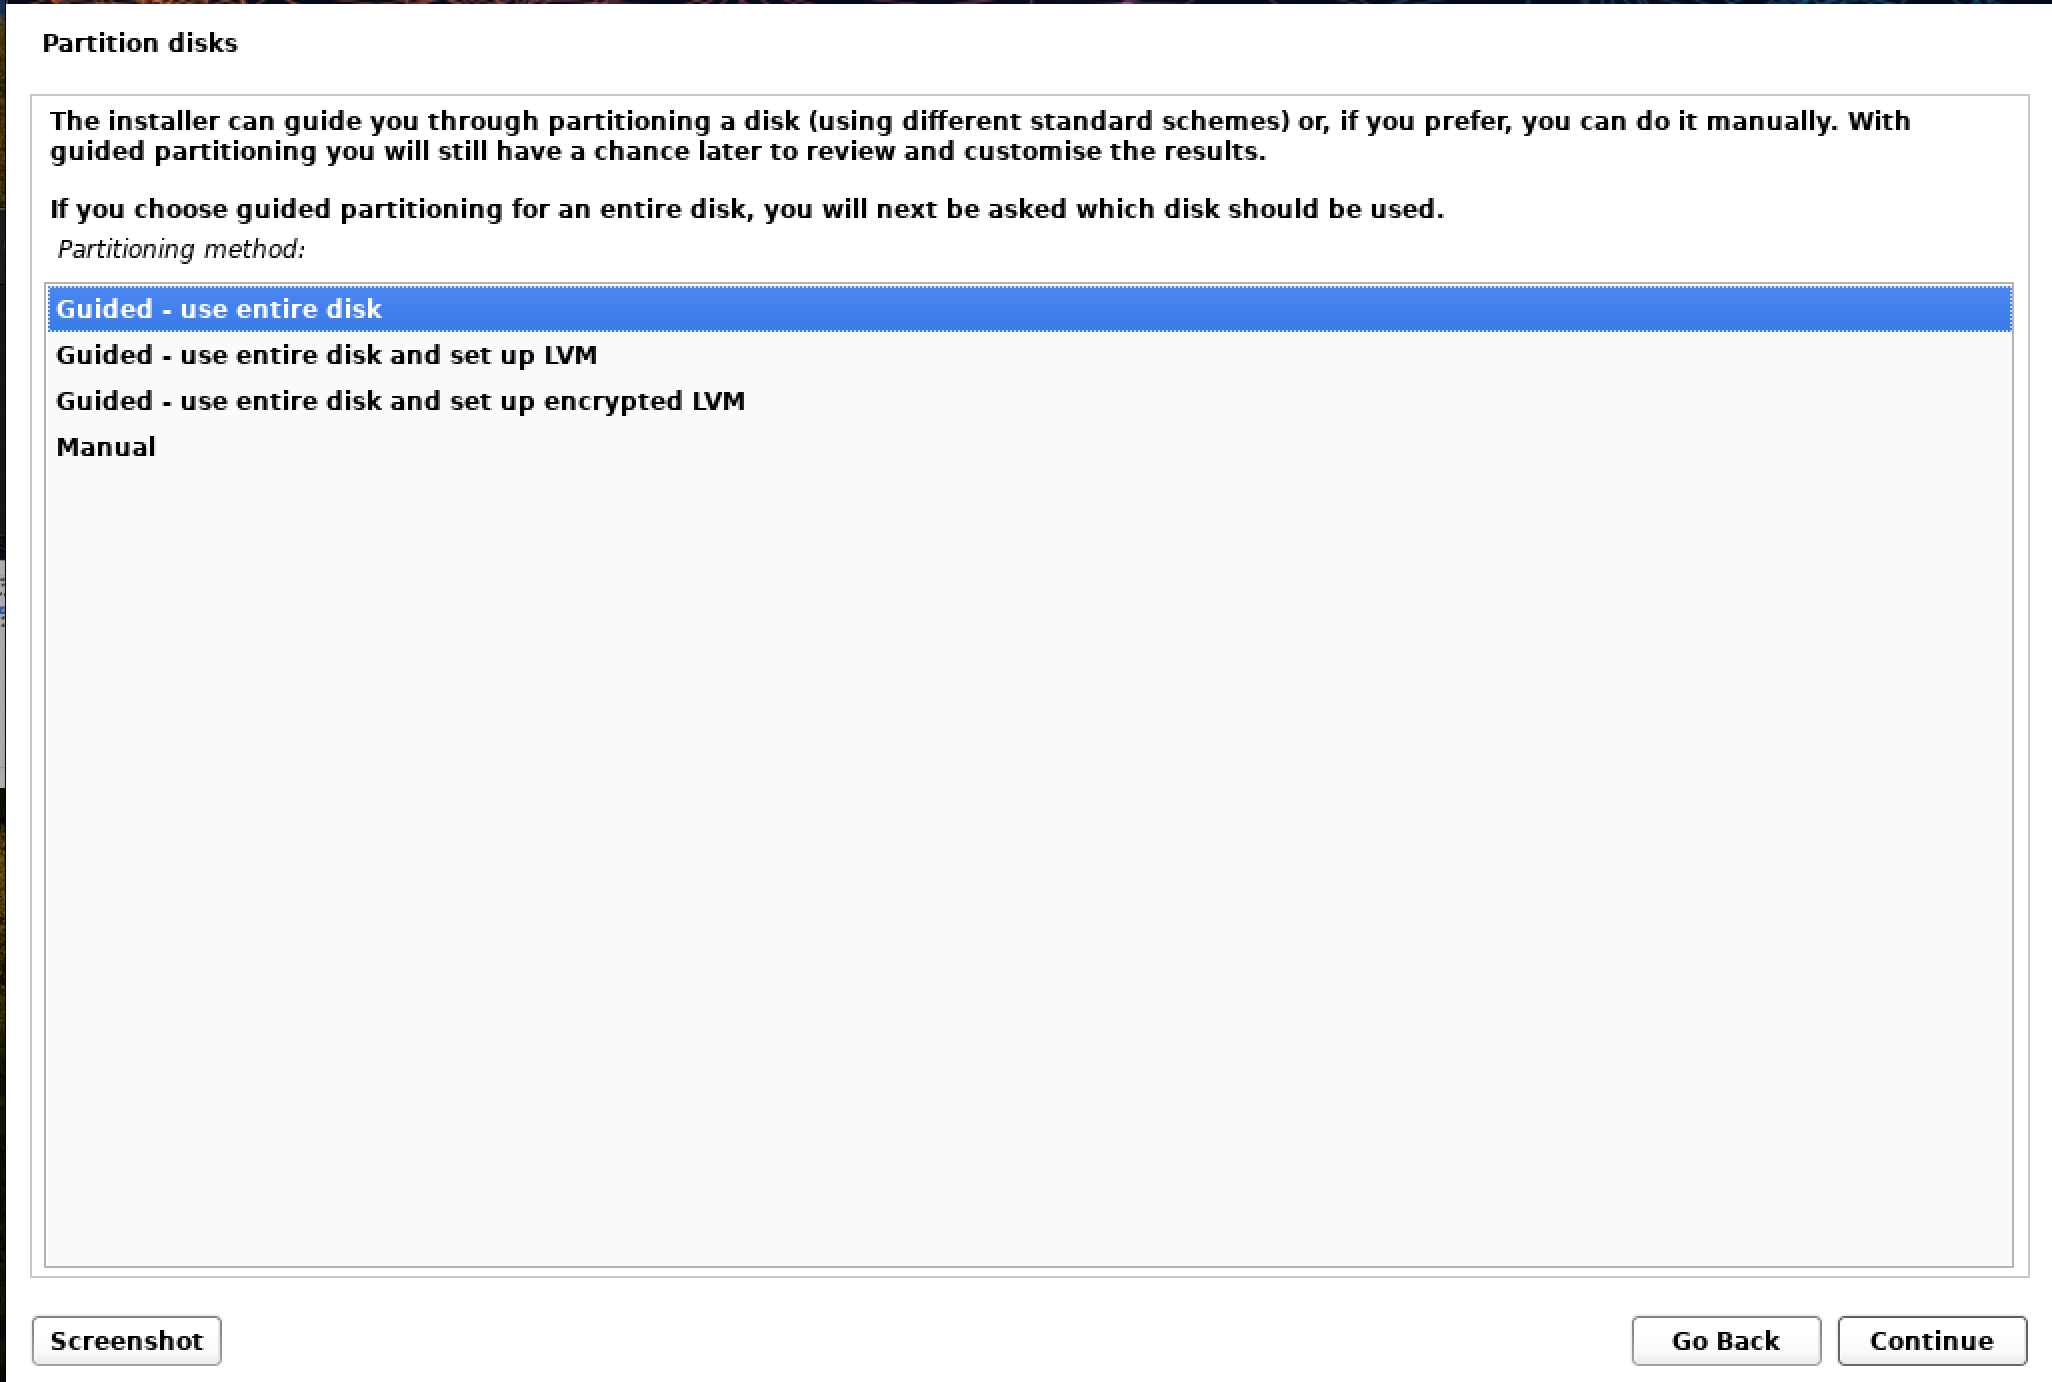
For the partitioning, use entire disk
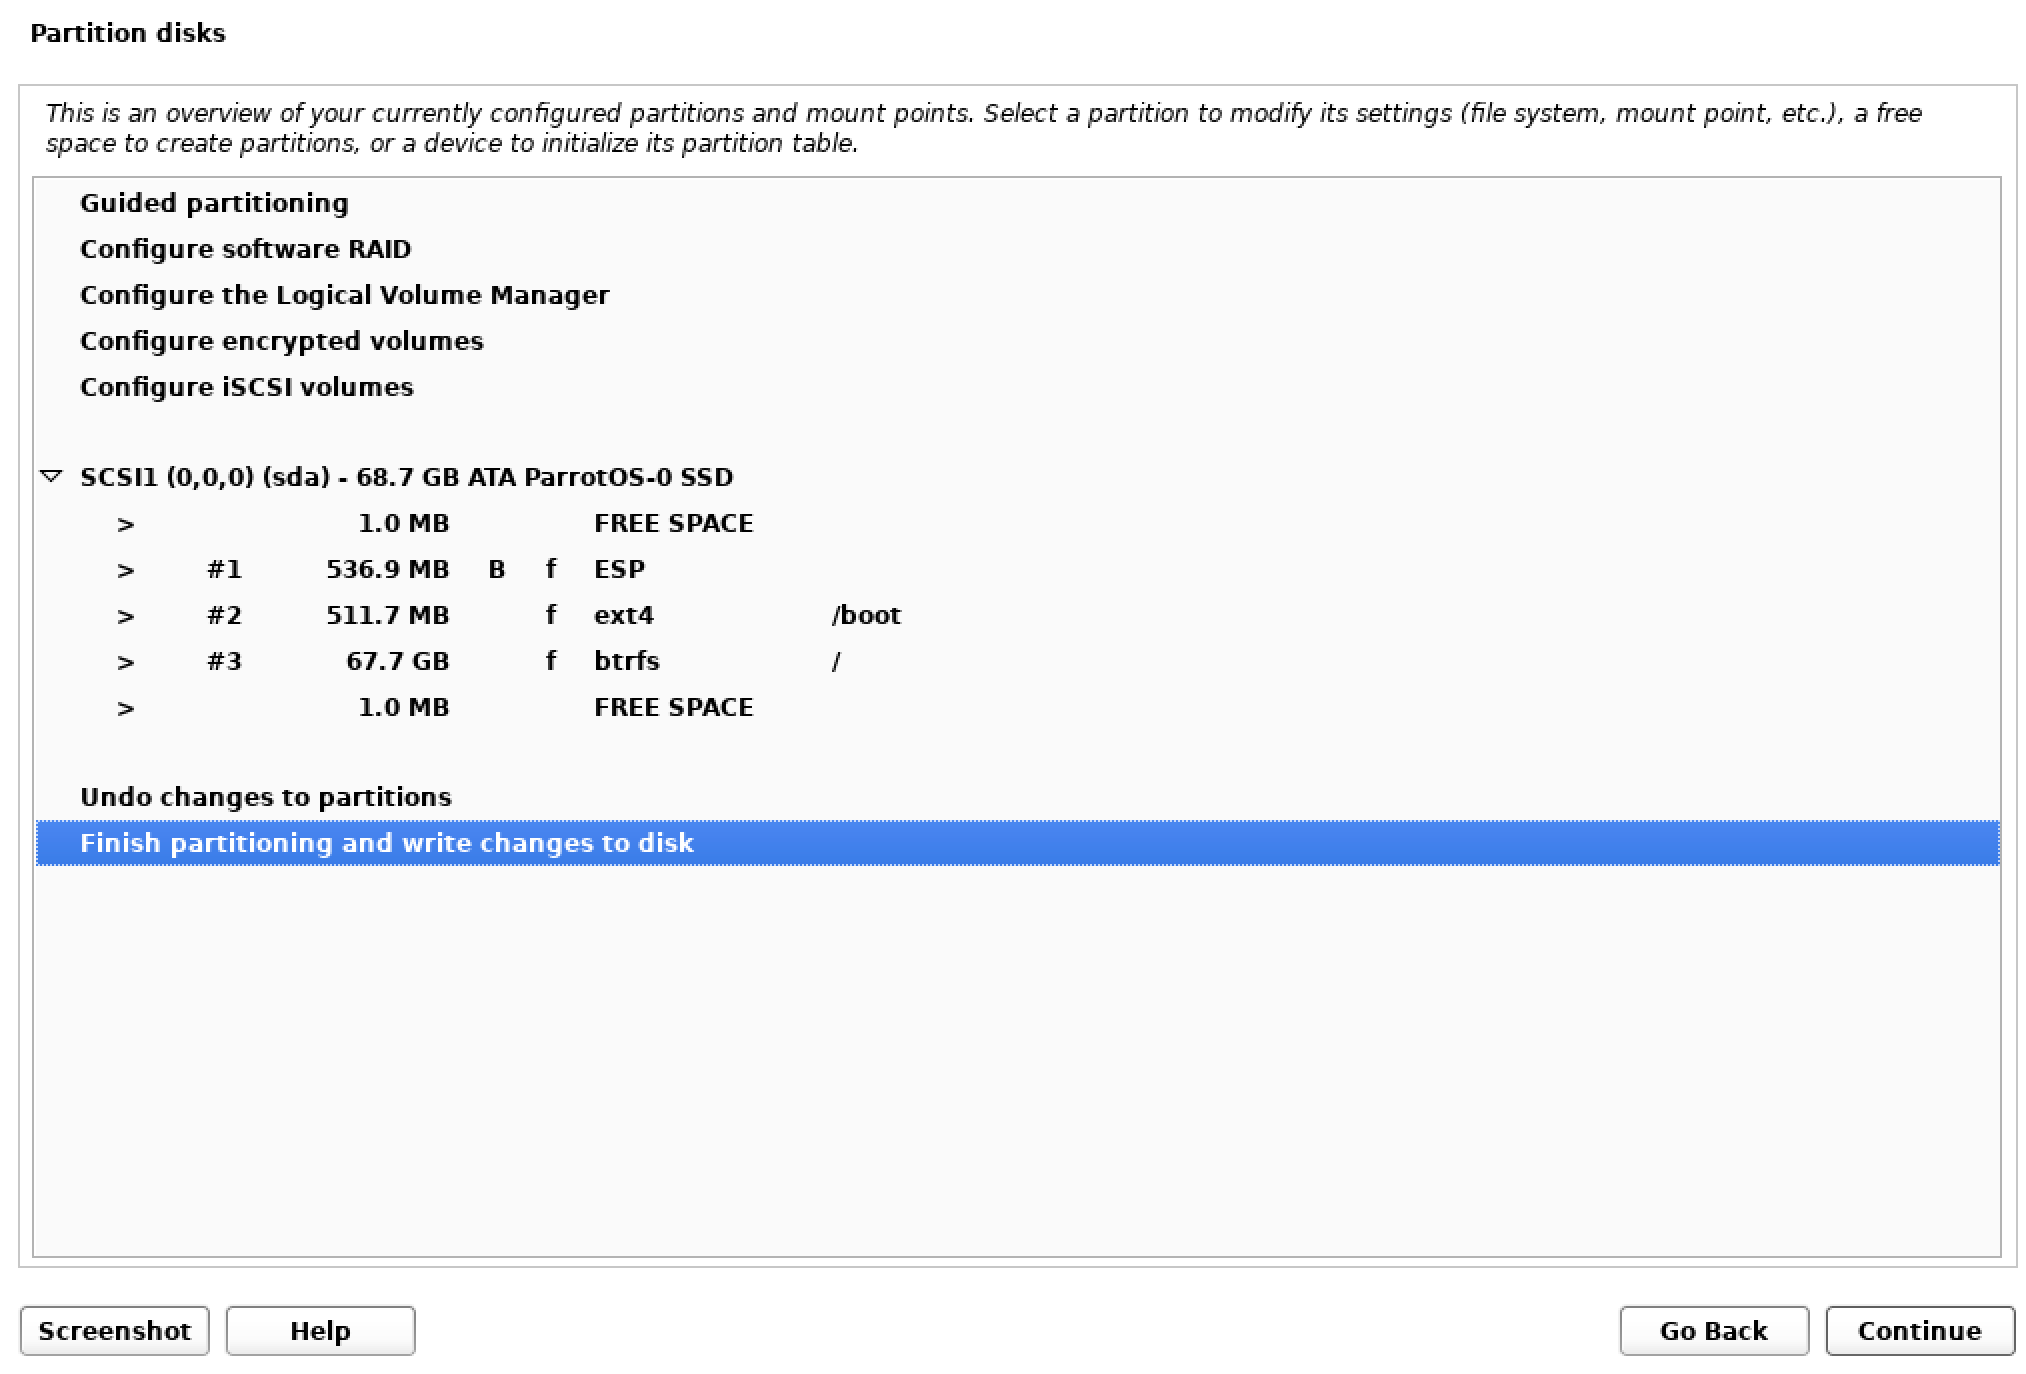
- Finish changes and write to disk
-
Click Yes when prompted for “write to disk”
-
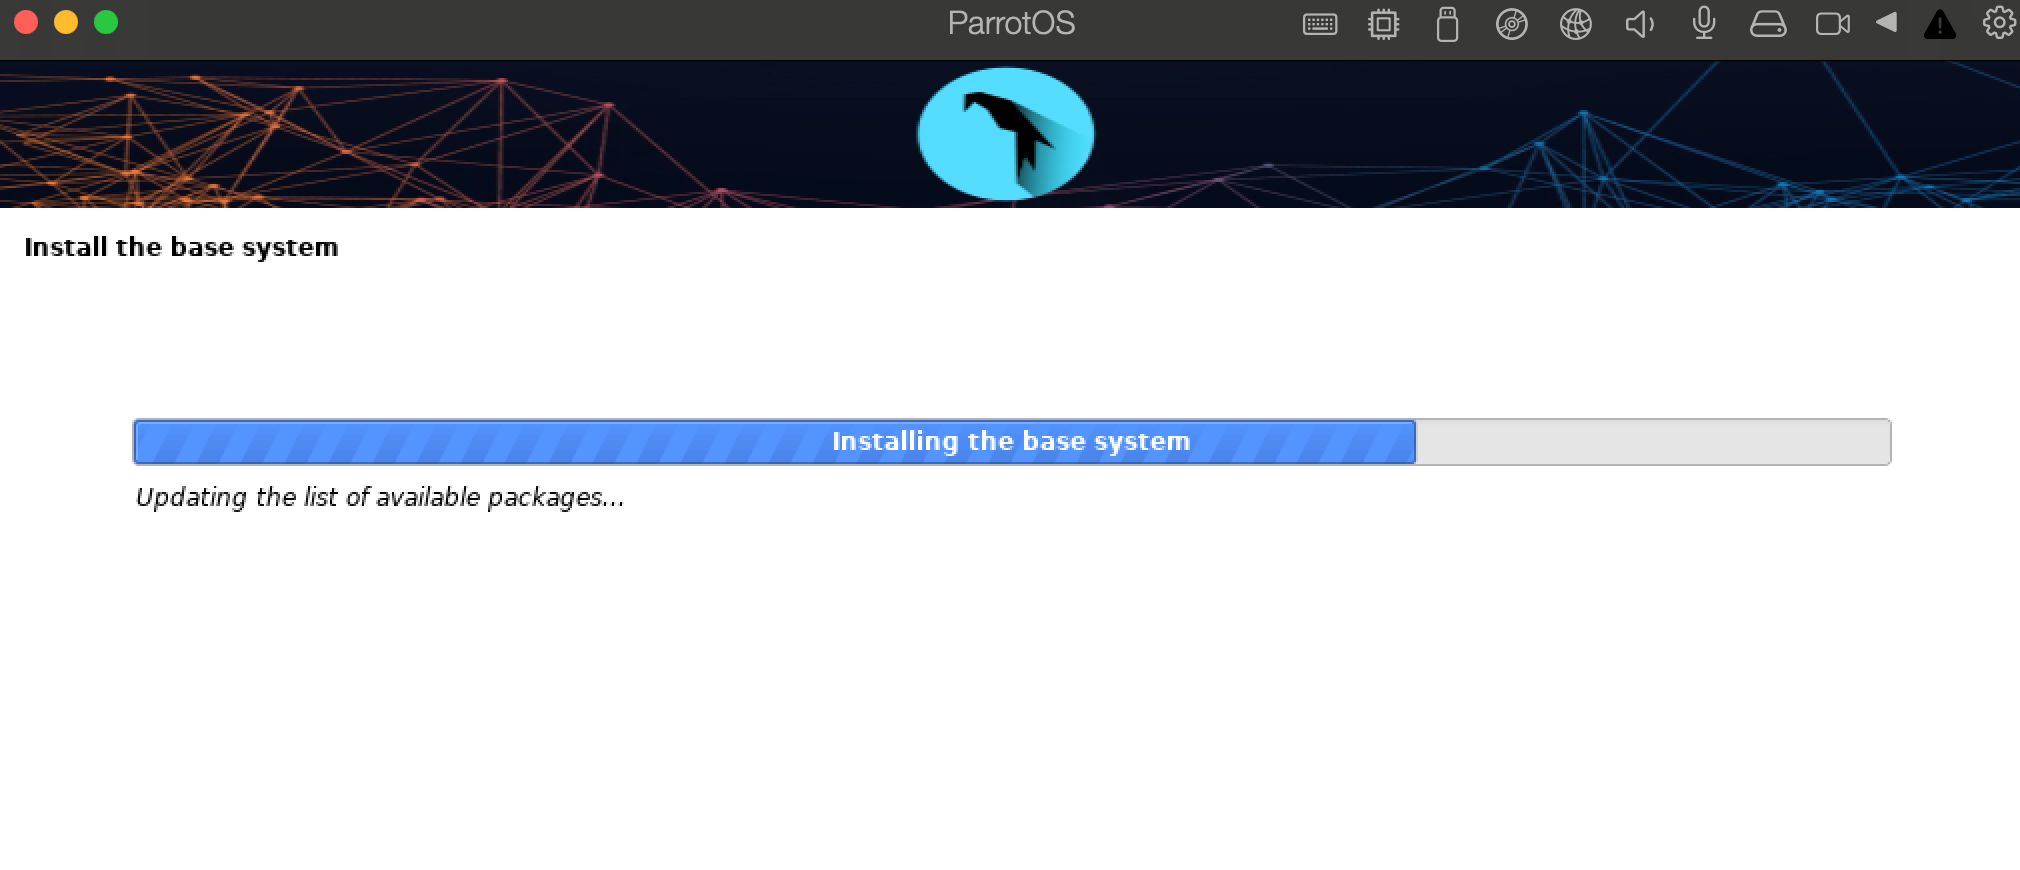
Wait for installation of base system to complete.
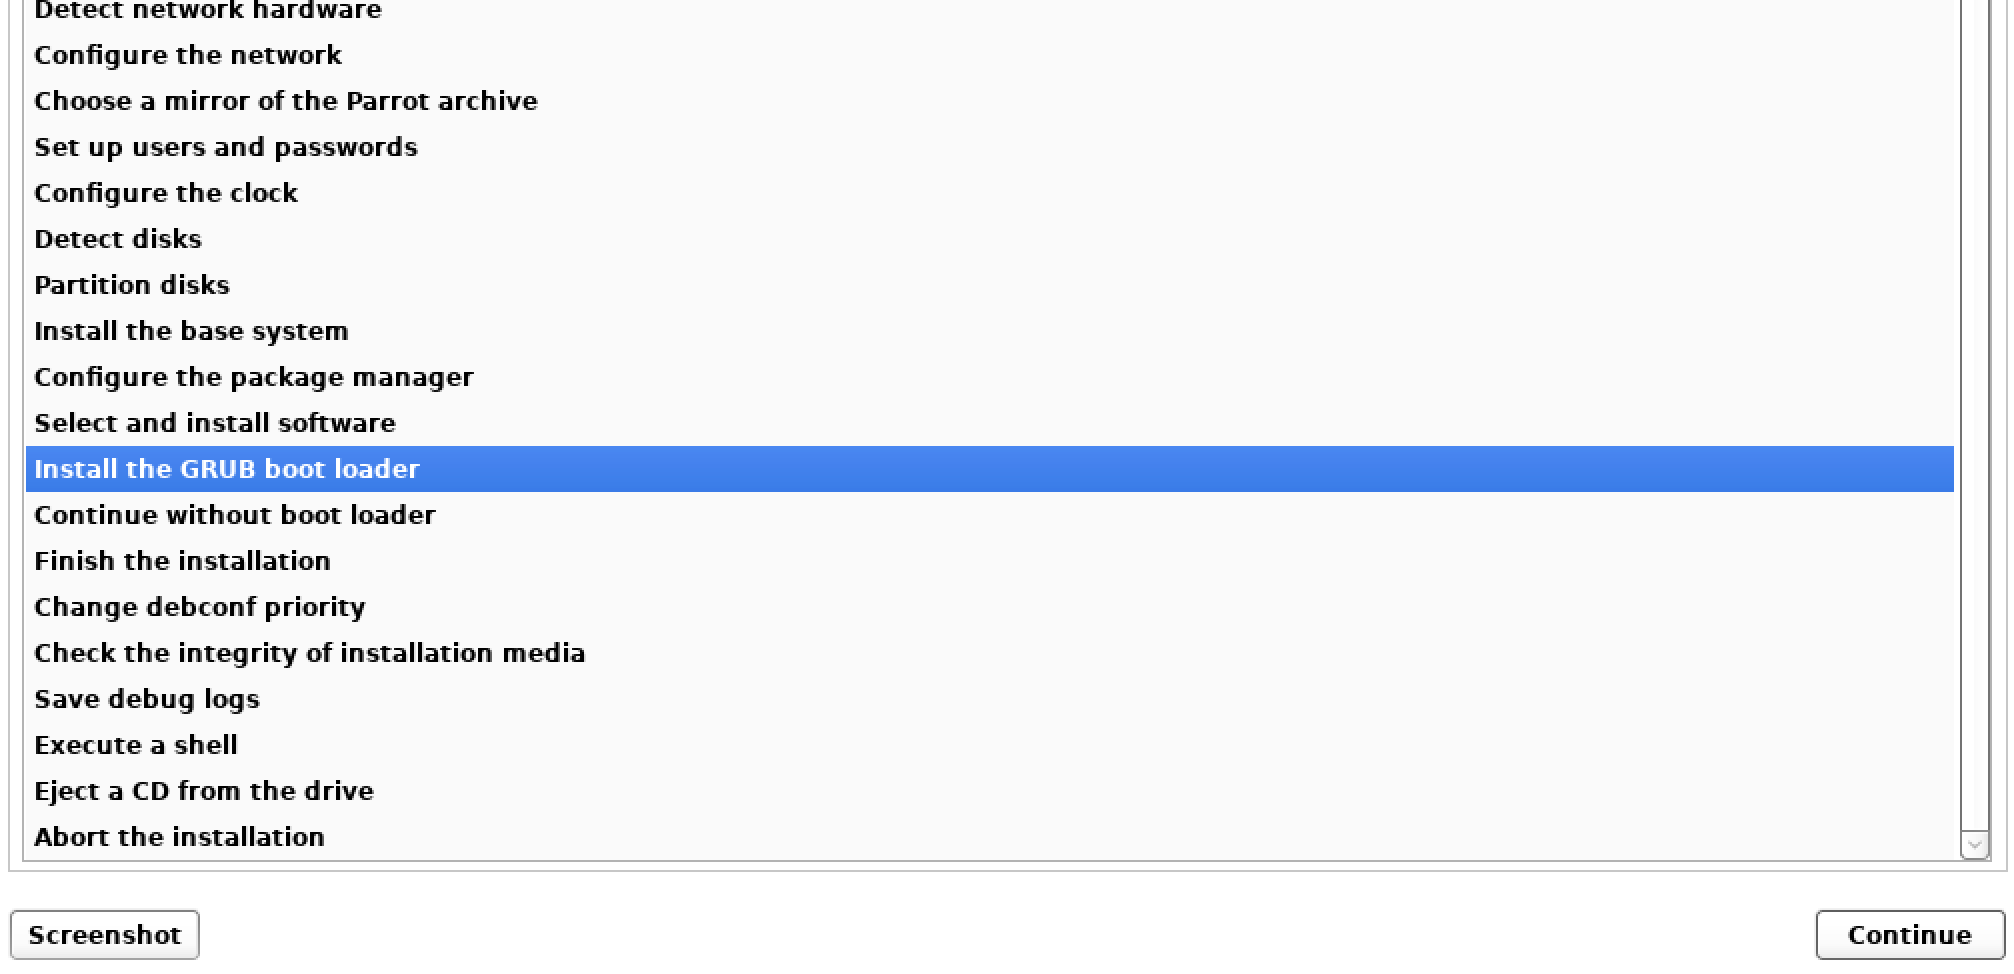
- When presented with the following screen, click on Go Back. This is an important step as if you don’t do it, it may result in installation being stuck after sometime.

- Click on Install the GRUB boot loader and click on Continue.
-
After installation, parrotOS will boot up. Login using your username and password. Your internet won’t be working and you won’t be having GUI as of now. You will need to install them.
-
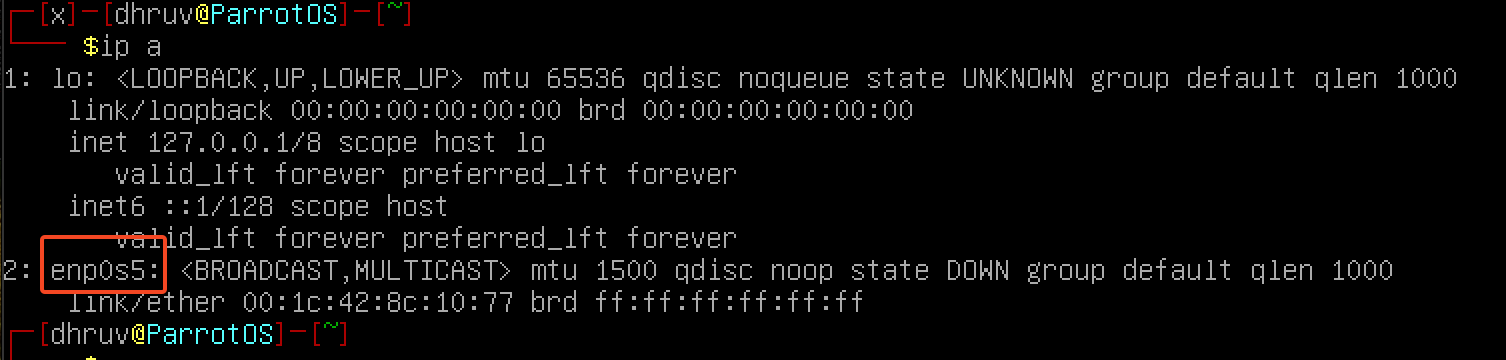
Run
ip acommand and output will be something like:
-
Copy the highlighted value and run:
sudo dhclient <COPIED_VALUE>. This will enable your internet. You can tryping -c 4 google.comto check if it’s working. -
To install GUI, run
sudo apt-install parrot-desktop-mate -y. You can replacematebygnomeor other graphical environment as per your liking. Runsudo apt search parrot-desktopto view list of available graphical environments. -
To install all security tools, run
sudo apt install parrot-tools-full -y. You can also install specific tools by replacingparrot-tools-fullbyparrot-tools-forensics, and so on. -
Type
rebootto reboot the VM and you will boot into the GUI with all tools installed. Enjoy :D